| View previous topic :: View next topic |
| Author |
Message |
DavidH
Bel Air
Joined: 23 Sep 2010
Posts: 118
Location: Texas
|
|
| Back to top |
|
 |
DavidH
Bel Air
Joined: 23 Sep 2010
Posts: 118
Location: Texas
|
 Posted: Sat Oct 06, 2012 8:14 pm Post subject: 55 Chevy Posted: Sat Oct 06, 2012 8:14 pm Post subject: 55 Chevy |
 |
|
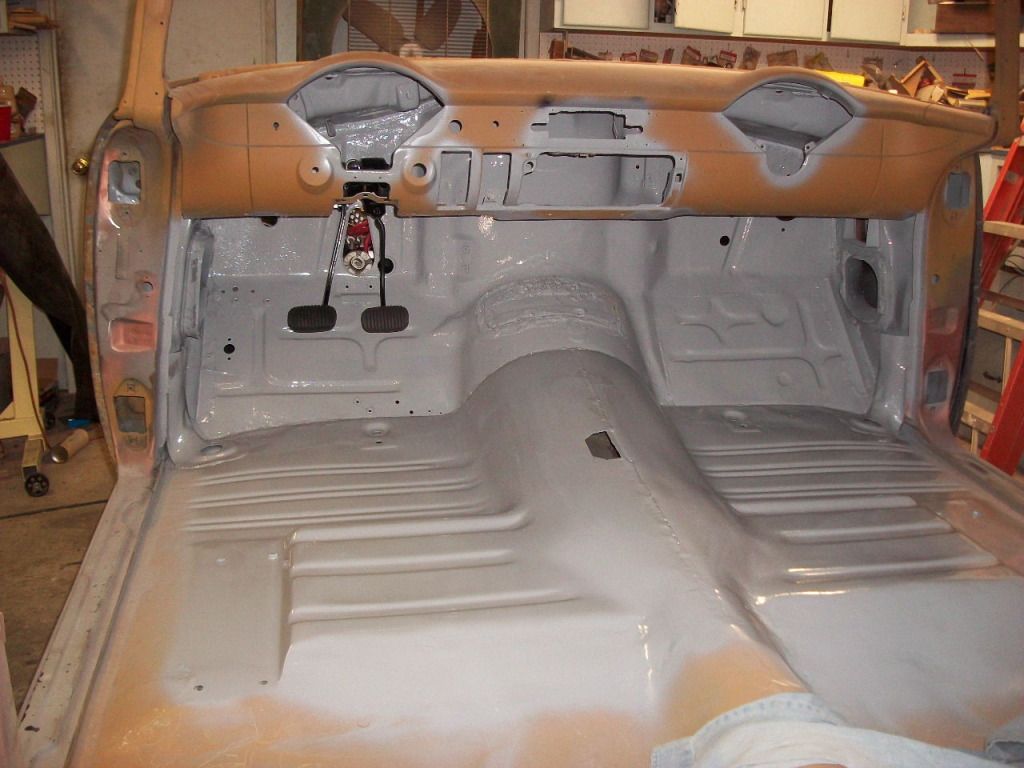
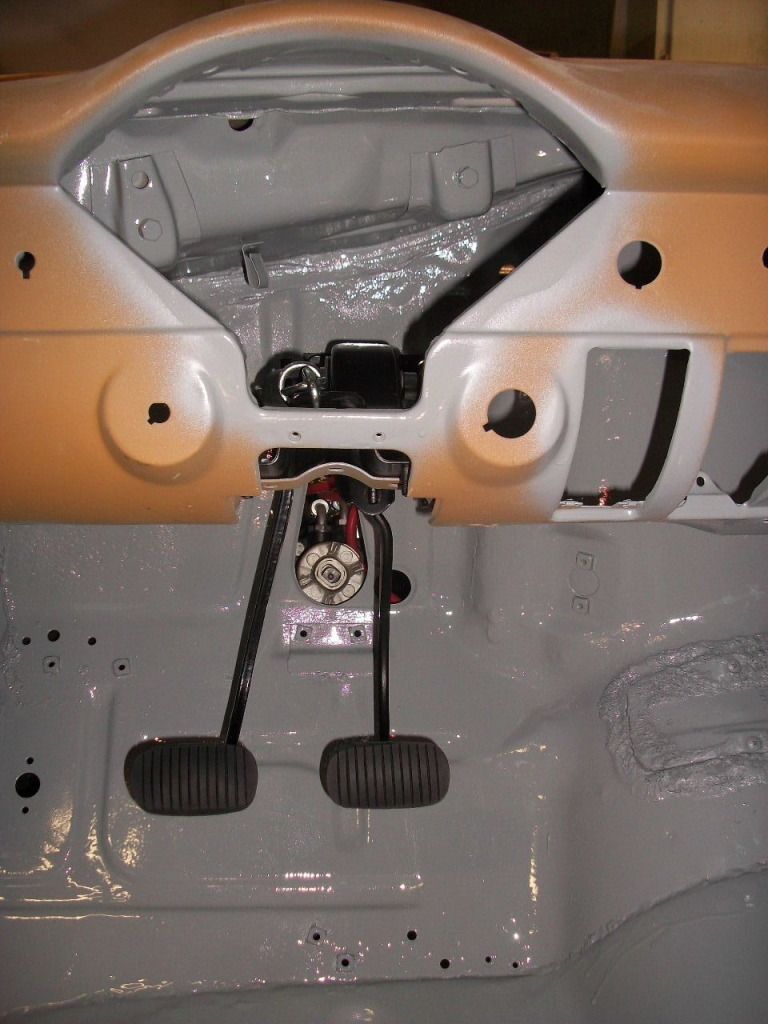
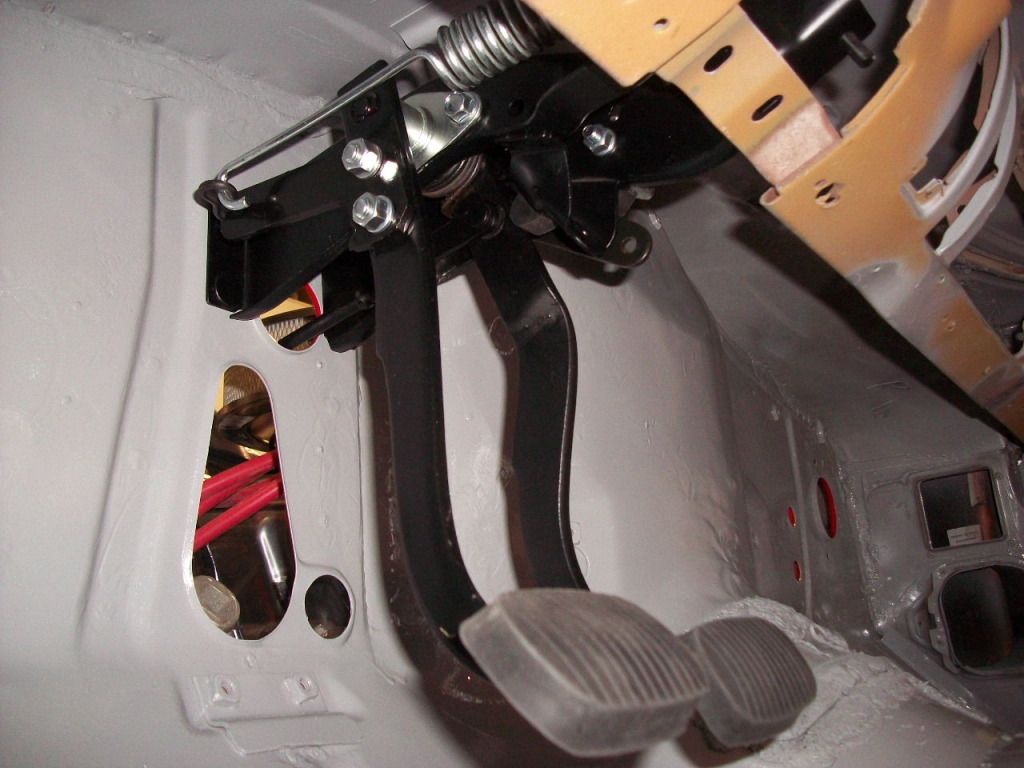
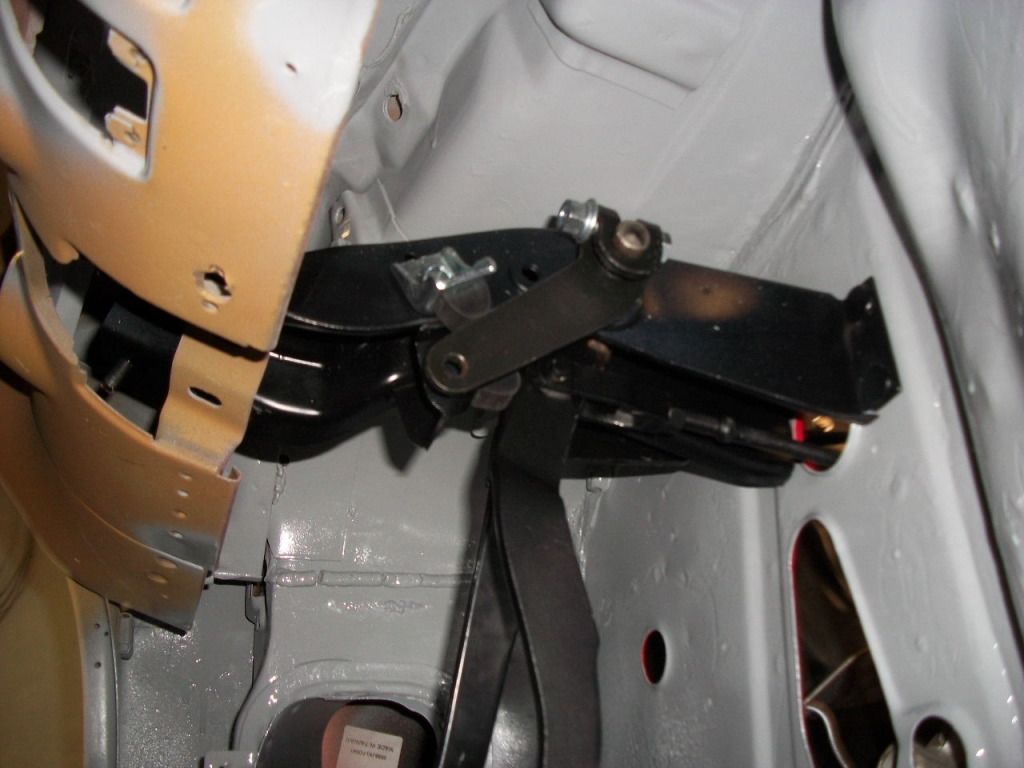
I got out in the beautiful weather today (nice and cool), and rebuilt the brake/clutch assembly. Epoxy coated the the firewall and floor.
It turned out super, such a far cry from what it was.
_________________
David Hudson
www.dcmodelshop.com |
|
| Back to top |
|
|
DavidH
Bel Air
Joined: 23 Sep 2010
Posts: 118
Location: Texas
|
| Posted: Tue Oct 16, 2012 10:00 pm Post subject: 55 Chevy |
|
|
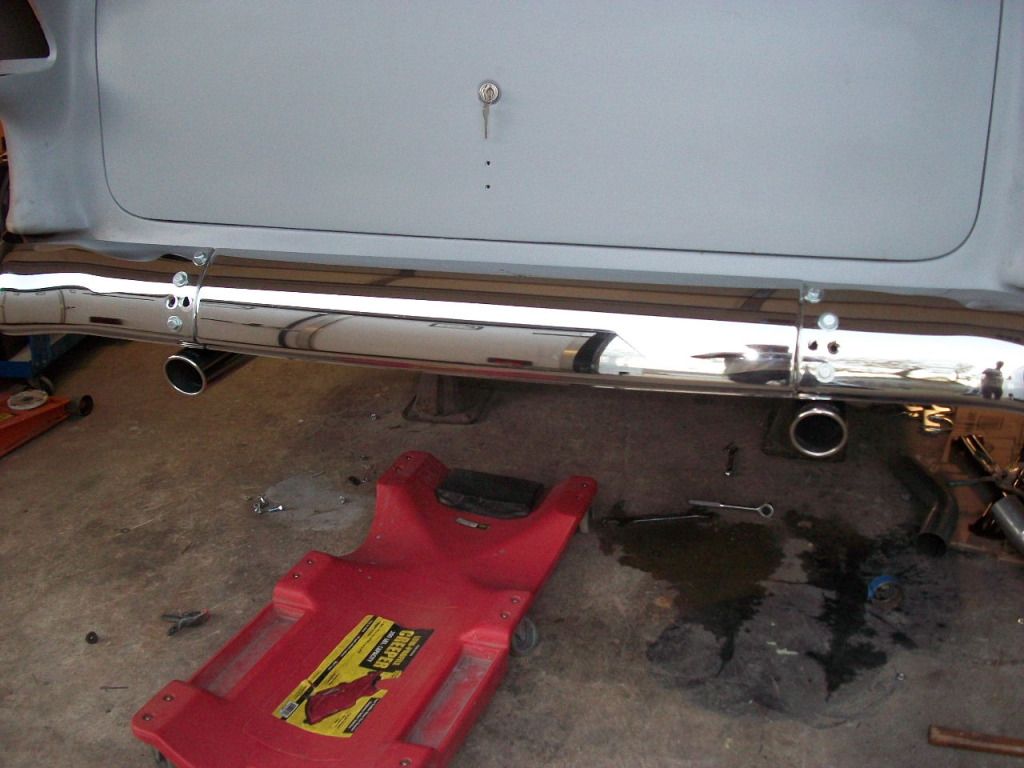
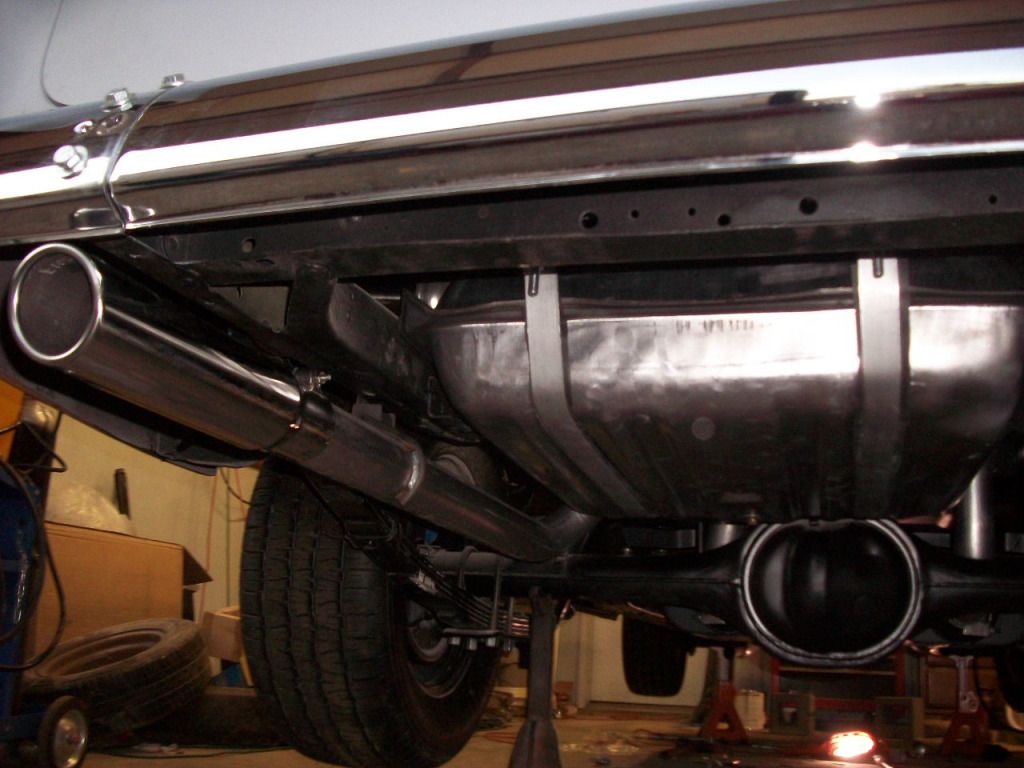
I bought a Flowmaster exhaust system for the 55. I'm having to do a couple of mods to go around the up-graded areas on the car. It is a H pipe setup and 2.5 size tubing. I'm looking forward in hearing it this weekend when it's done.
_________________
David Hudson
www.dcmodelshop.com |
|
| Back to top |
|
|
DavidH
Bel Air
Joined: 23 Sep 2010
Posts: 118
Location: Texas
|
| Posted: Sat Oct 20, 2012 7:52 pm Post subject: 55 Chevy |
|
|
OK,,exhaust all hooked up and running. I know this sound and stuff is old hat to you grizzled car veterans,but it's just sweet ear candy to this guy. 
The system is a Flowmaster Dual Exhaust Kit.
# FLT17174, 17174
Series: American Thunder
The engine is a sbc 327. This system is designed for the Tri-5's
http://www.youtube.com/watch?v=1iBUv0-Tkrg&feature=plcp
_________________
David Hudson
www.dcmodelshop.com |
|
| Back to top |
|
|
DavidH
Bel Air
Joined: 23 Sep 2010
Posts: 118
Location: Texas
|
| Posted: Sat Oct 27, 2012 6:19 pm Post subject: 55 Chevy |
|
|
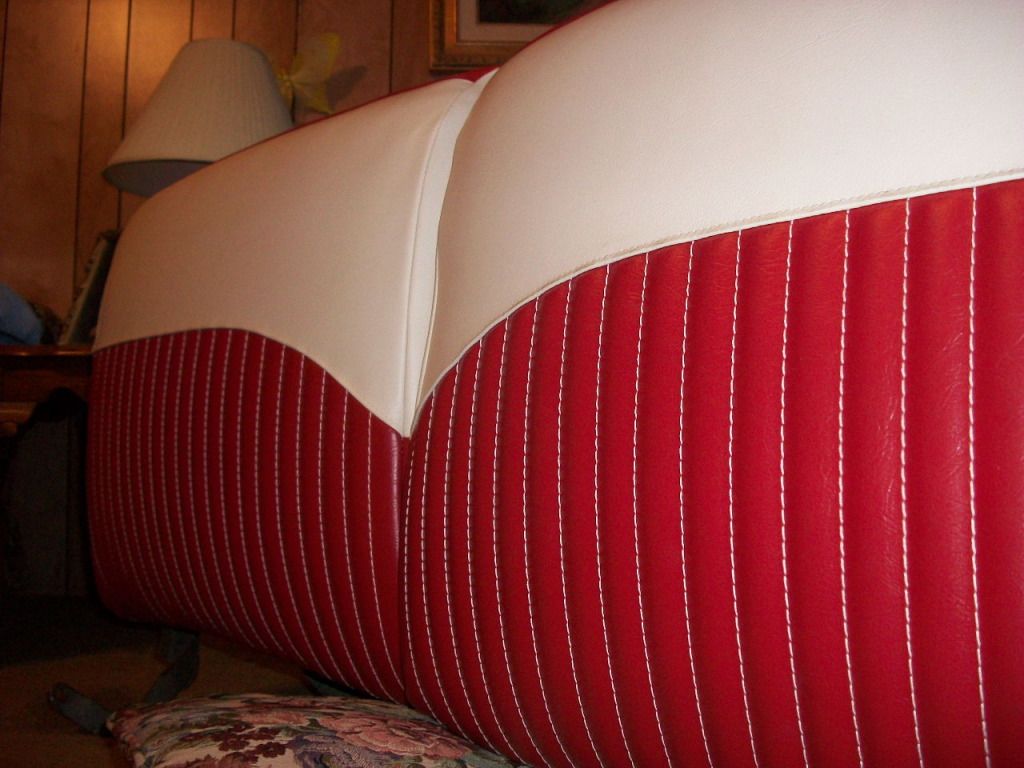
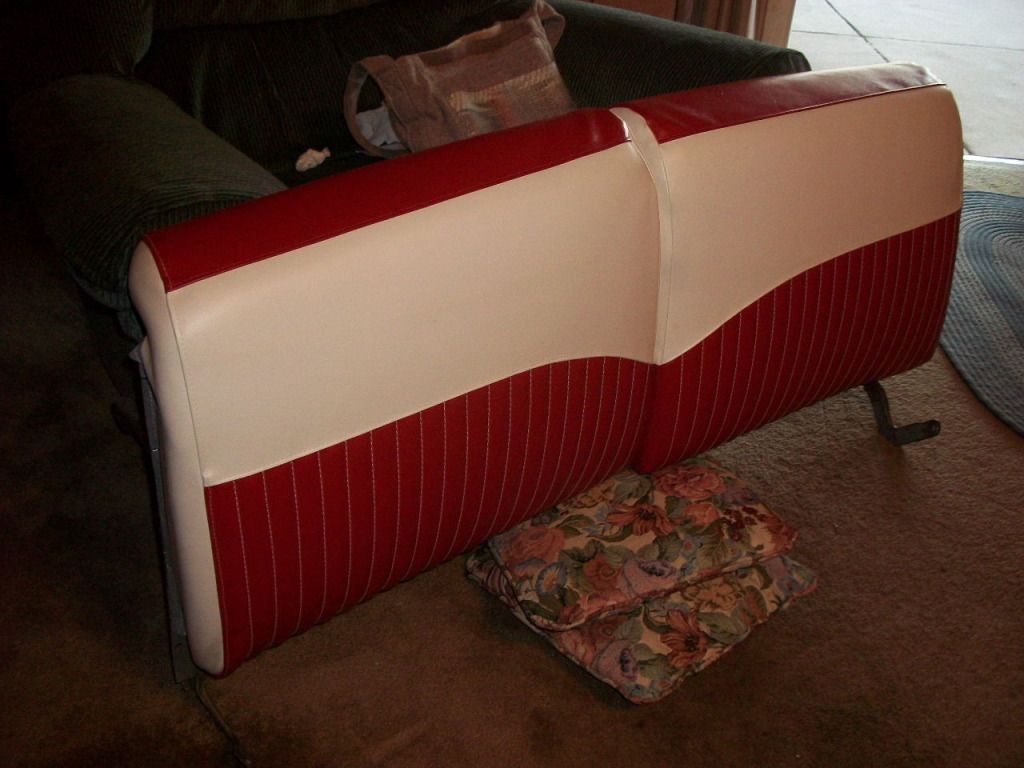
I got off on a rabbit trail today and started working on the upholstery. The front seat backs. I was going to take them to the professionals but I thought how hard can it be?????????
Of coarse I didn't sew it, just hog ringed it on 
_________________
David Hudson
www.dcmodelshop.com |
|
| Back to top |
|
|
DavidH
Bel Air
Joined: 23 Sep 2010
Posts: 118
Location: Texas
|
| Posted: Sun Oct 28, 2012 6:56 pm Post subject: 55 Chevy |
|
|
Just one more picture of the front seat together. I haven't finished the shells.
The seat kit was sewn by Ciadella Interiors.
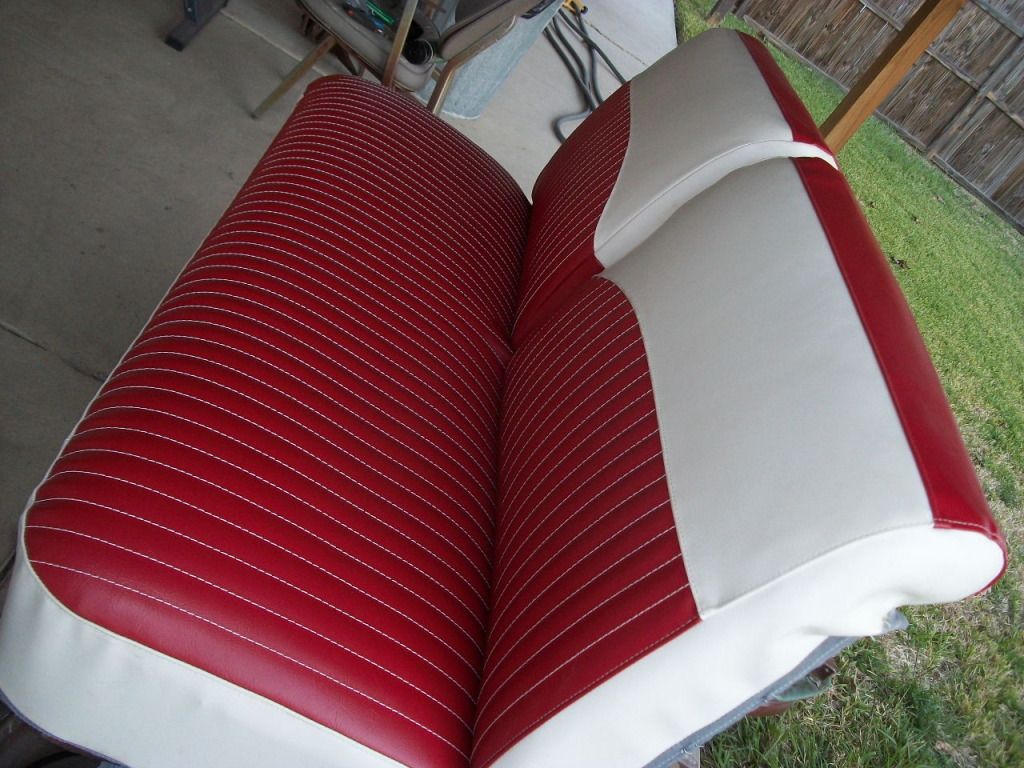
I did the easy part.
_________________
David Hudson
www.dcmodelshop.com |
|
| Back to top |
|
|
Irv
210 Series
Joined: 29 Nov 2006
Posts: 31
Location: LUFKIN, TX
|
| Posted: Tue Oct 30, 2012 6:35 pm Post subject: |
|
|
Looks like a pro job to me!
_________________
Irv |
|
| Back to top |
|
|
David Graves
Site Admin

Joined: 02 Jun 2005
Posts: 1384
Location: Warsaw, TX
|
| Posted: Fri Nov 02, 2012 1:34 pm Post subject: |
|
|
coming along very nicely! thanks for keeping us up to date on this project!!
_________________
In My Garage -
'55 Bel Air Hardtop
'55 Bel Air 2dr Sedan
'56 Corvette
'67 Camaro RS
'69 Blown 427 nostalgia front engine dragster
'17 Indian Chief Vintage |
|
| Back to top |
|
|
DavidH
Bel Air
Joined: 23 Sep 2010
Posts: 118
Location: Texas
|
| Posted: Mon Nov 19, 2012 10:05 pm Post subject: 55 Chevy |
|
|
Thanks Guys!
Well,with most of the odds and ends done underneath (I think) 
I'm getting back on the body again. I bolted the left door in place with the fender and with some violate massaging on that fender it decided to get into alignment. The gaps are very close and I'm happy with that.
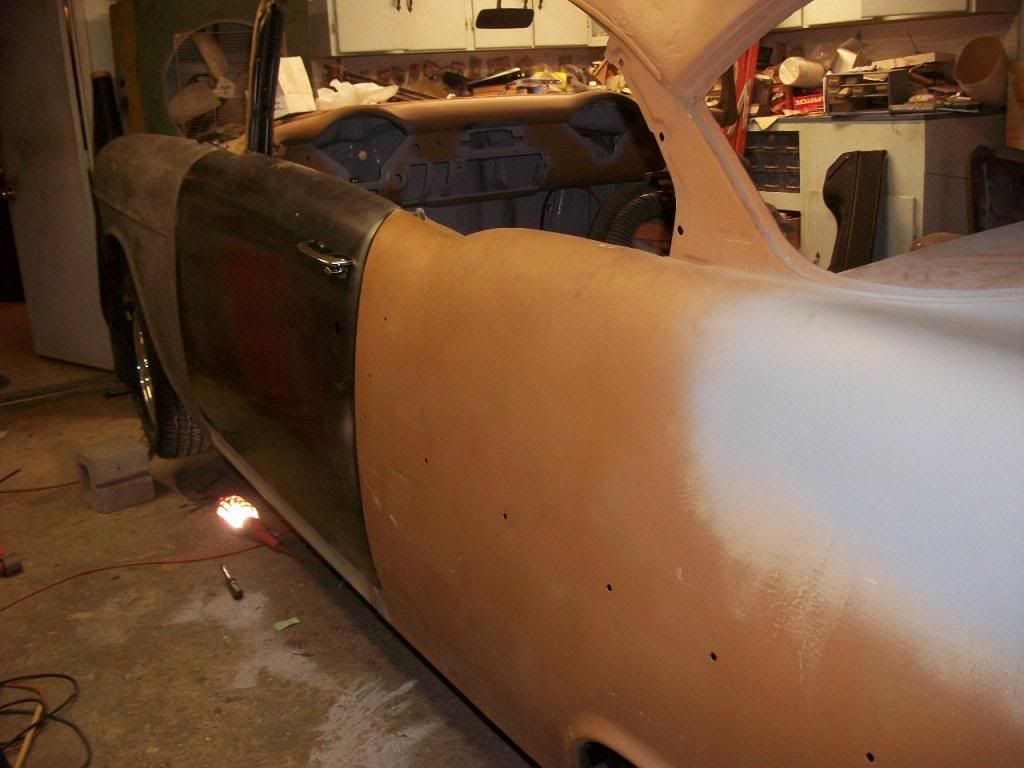
On my way to test fit the frontend sheetmetal.
_________________
David Hudson
www.dcmodelshop.com |
|
| Back to top |
|
|
DavidH
Bel Air
Joined: 23 Sep 2010
Posts: 118
Location: Texas
|
| Posted: Sun Nov 25, 2012 8:38 pm Post subject: |
|
|
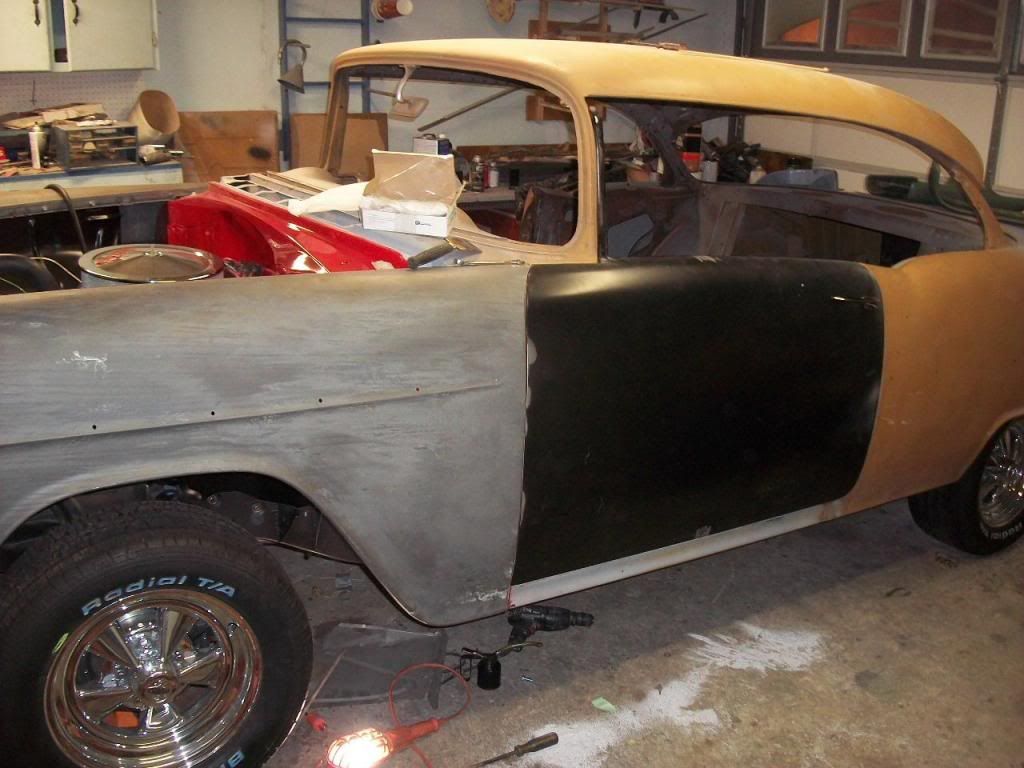
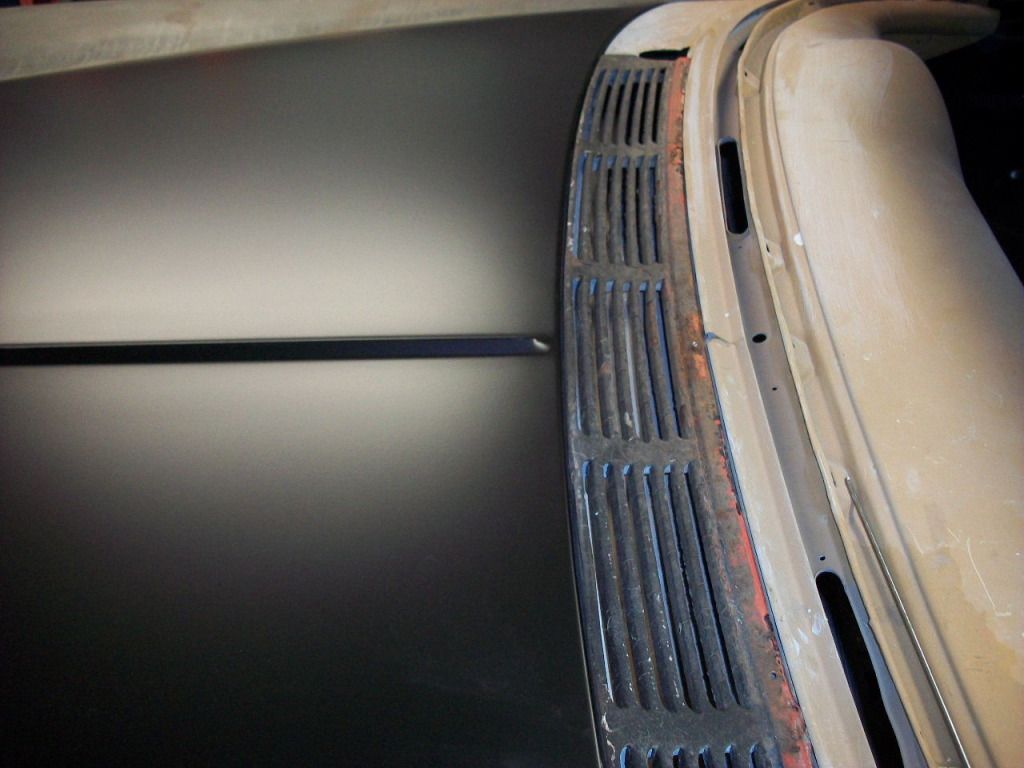
I got the right door in place and tied down the right fender. The gaps look good just a bit of work needed. I also got the hood mounted and have started working the hood and fender gaps.
Like I have been doing I’ll be going with the flow and working each problem that shows. The contour of the lower section of the right fender was totally jacked up so it’s not only making the new stuff fit the old stuff need love to. I’m thinking on this car if it wasn’t rusted it was bent.
Oh that hood several areas on that bad boy needs a whompin.
P.S. check out that vent grill. 

_________________
David Hudson
www.dcmodelshop.com |
|
| Back to top |
|
|
DavidH
Bel Air
Joined: 23 Sep 2010
Posts: 118
Location: Texas
|
| Posted: Sat Dec 01, 2012 9:42 pm Post subject: 55 Chevy |
|
|
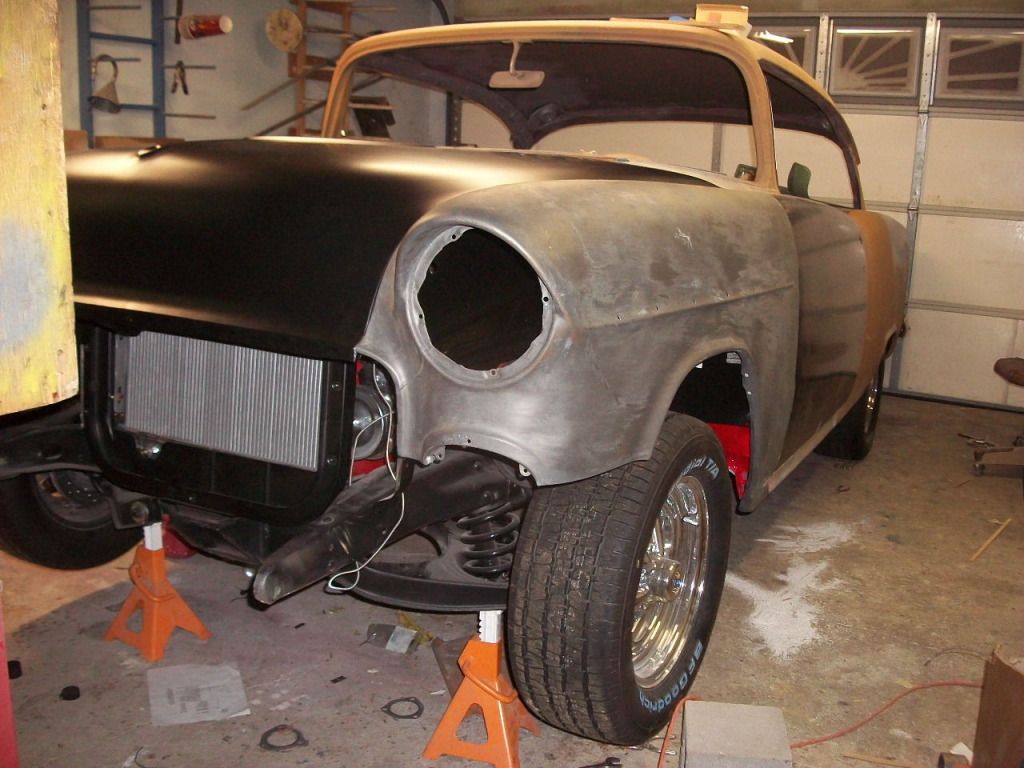
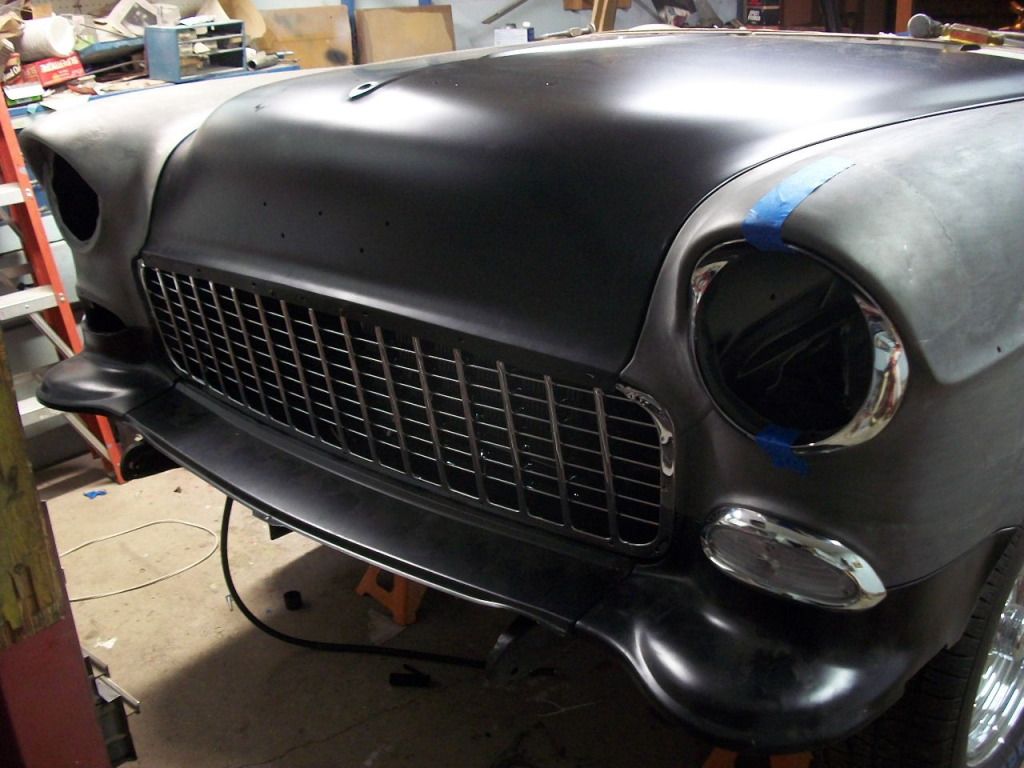
I’m still working the front end. A lot of things going on with that. So I’m thinking I should bolt most the stuff together to adjust things before the paint flies.
Very much finding places that need grinding,cutting,welding,or whatever. On the left side of the hood I have a major gap to close,so let the games began.
This is the slow down and think about time before you do anything big.
_________________
David Hudson
www.dcmodelshop.com |
|
| Back to top |
|
|
57boxman
Bel Air

Joined: 13 Jun 2005
Posts: 714
Location: The Colony, Texas
|
|
| Back to top |
|
|
DavidH
Bel Air
Joined: 23 Sep 2010
Posts: 118
Location: Texas
|
| Posted: Sun Feb 24, 2013 10:21 pm Post subject: 55 Chevy |
|
|
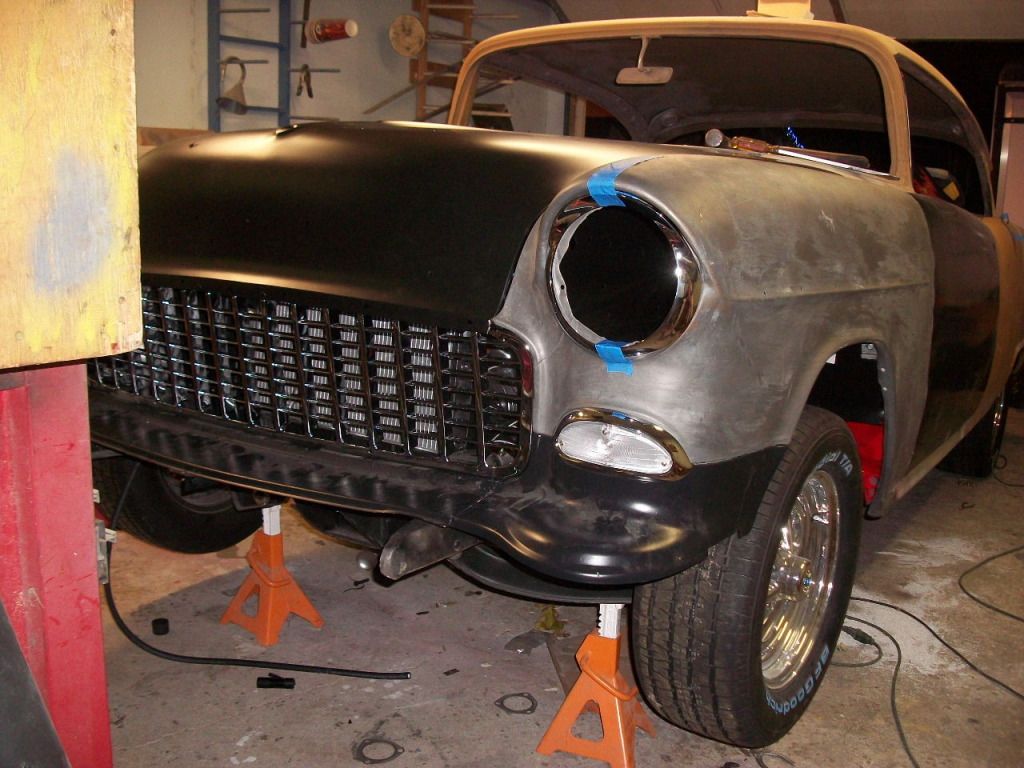
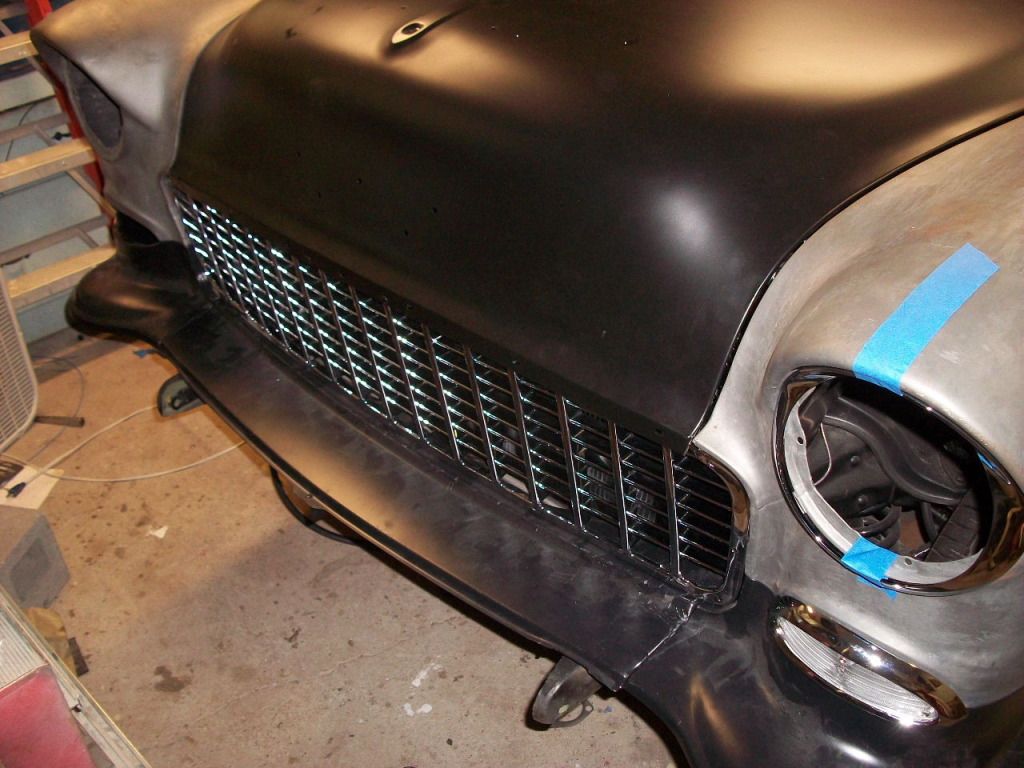
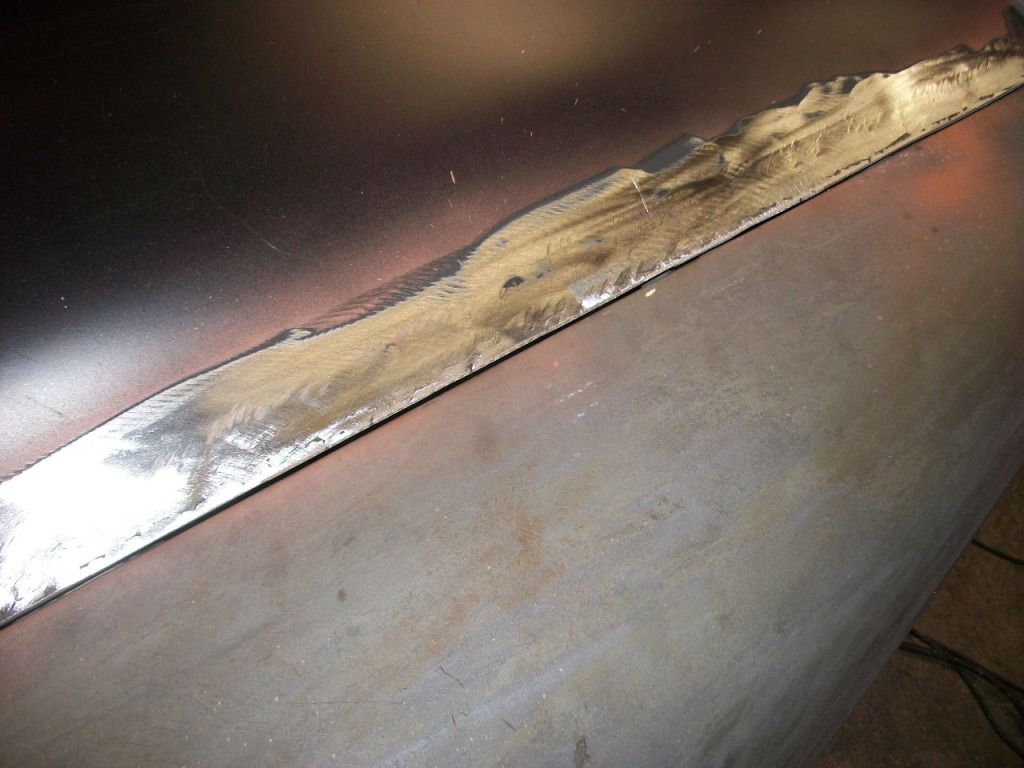
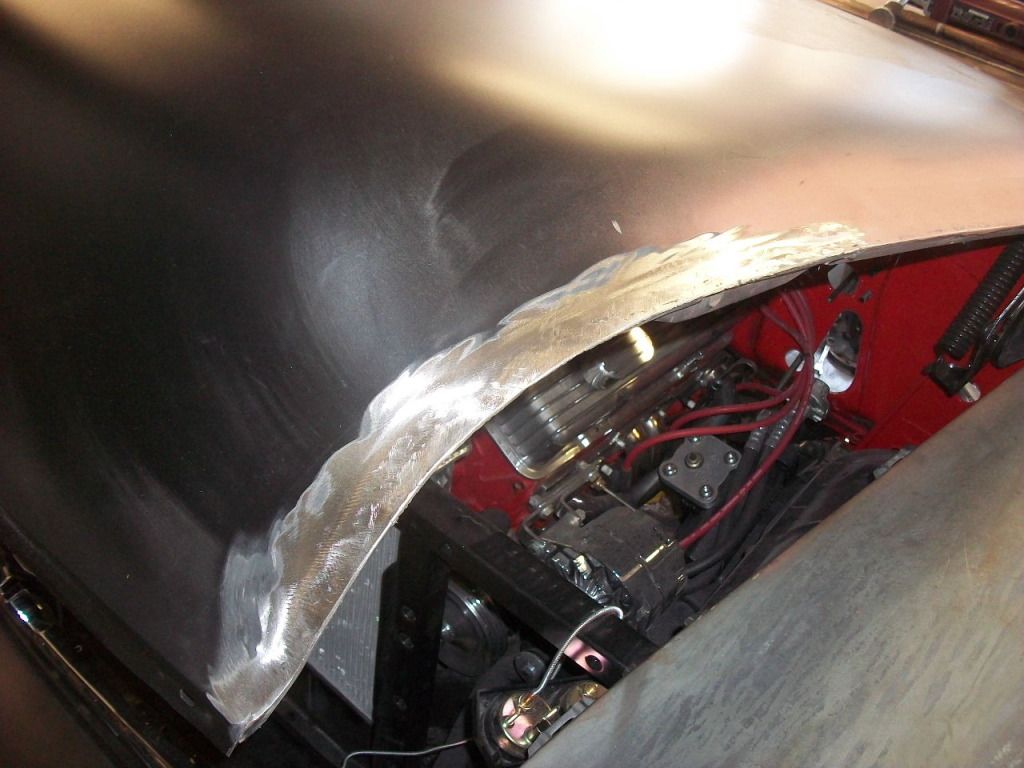
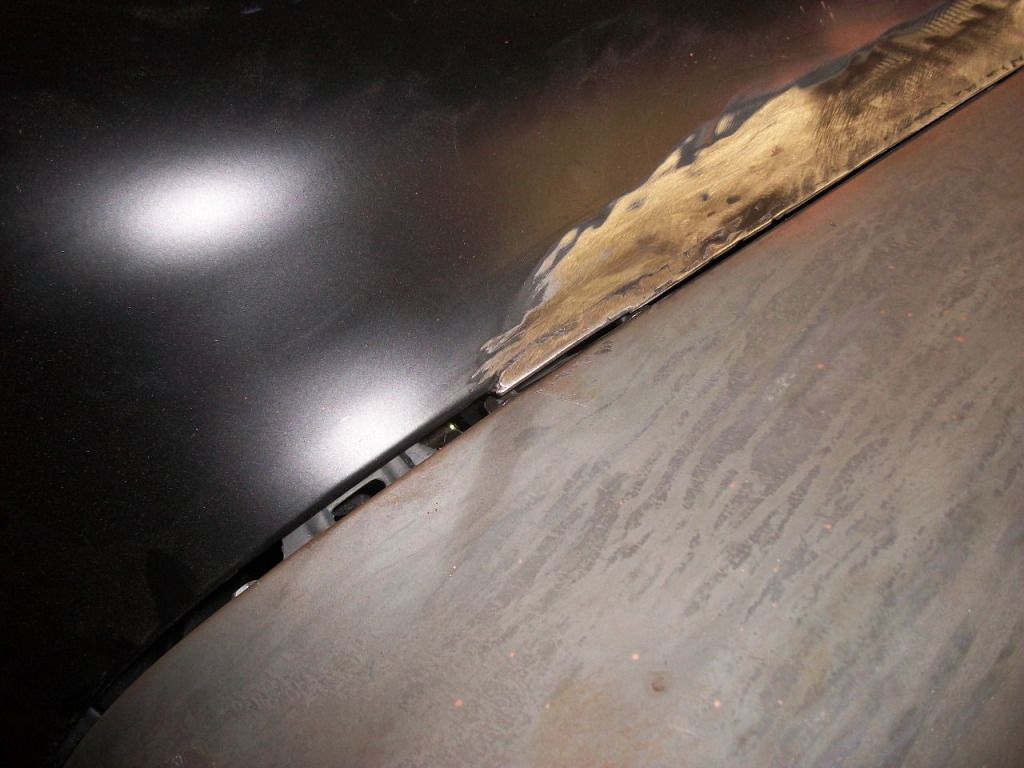
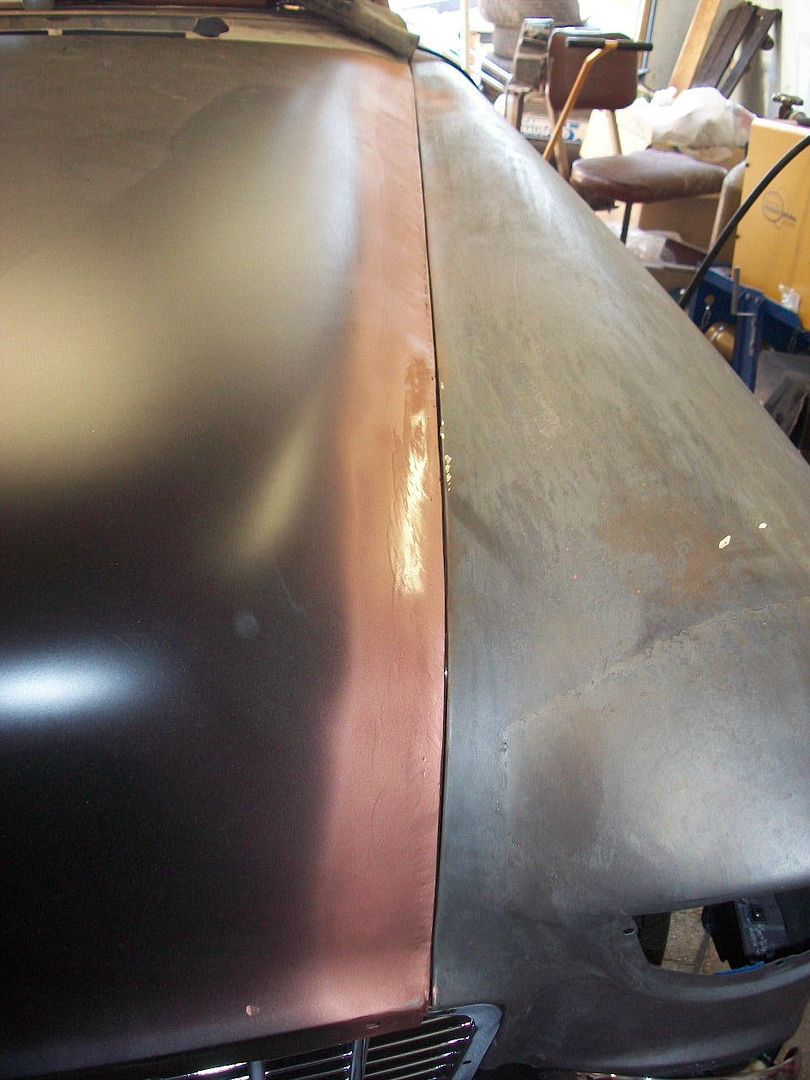
Hi guys it's been a while ,I'm still here. I'm starting to work on the car again after pulling off for some other things.
The front clip is looking pretty good after adjusting everything,(unless I miss something) except a nasty gap alone the left fender/hood.
I finally decided I had to close it. I decided to simply cut the left edge of the hood off and move it towards the fender and weld the gap.  Mercy that hood gets Mercy that hood gets
un-stable! After I got my composure back I worked the alingment and seam
and I believe all is well,(for now). Not perfect yet but in the workable area now. So here are some picks.
[IMG]http://i1217.photobucket.com/albums/dd396/dcmf8/100_2568_zpsaeb3cf05.jpg[/IMG
_________________
David Hudson
www.dcmodelshop.com |
|
| Back to top |
|
|
acardon
Bel Air
Joined: 12 Jul 2005
Posts: 273
Location: Southlake, Tx.
|
| Posted: Thu Feb 28, 2013 8:34 am Post subject: |
|
|
That's looking good David. Your going to have a well fitting body.
Don |
|
| Back to top |
|
|
57boxman
Bel Air
Joined: 13 Jun 2005
Posts: 714
Location: The Colony, Texas
|
|
| Back to top |
|
|
|

